I’ve always preferred the more slow and patient type of photography, rather than a fast-paced moment-to-moment one. Give me five equally interesting events that all happen at the same time in the same spot, and I’ll probably choose to focus on only one of them, rather than swiftly guess-and-shoot all of the five. Maybe it’s because of my past 4-year film studies, that I’m looking at any frame on the street the same way you would on a movie set - as something worth investing time on.
And so, it made sense that I’ll eventually want to “complicate” my film photography experience even more. A bigger camera sensor for sharper details; a tripod for maximum accuracy; a spot meter with only one button; a whole new range of questions and decisions; a whole new set of basic rules. A new work mode - where I’m not afraid of missing out anymore; where calmness is key.
Cause If I like spending 15 minutes on one composition - why not just push it even further? Let’s make it 30. Make it 40, if we don’t mind waiting patiently for the sun to pip through the clouds for a tiny and decisive moment.
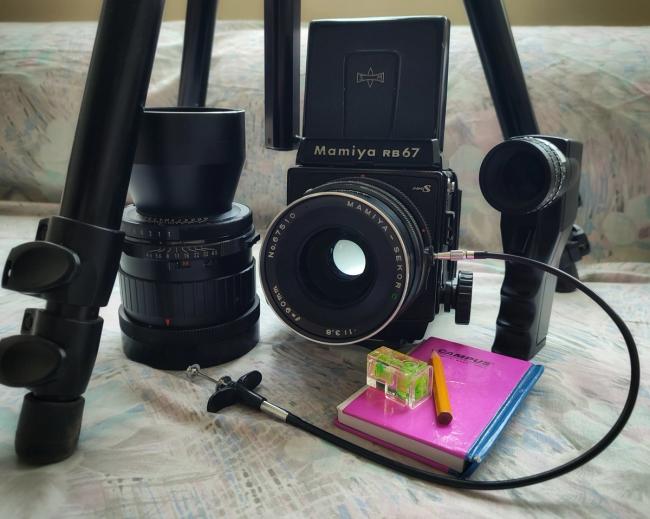
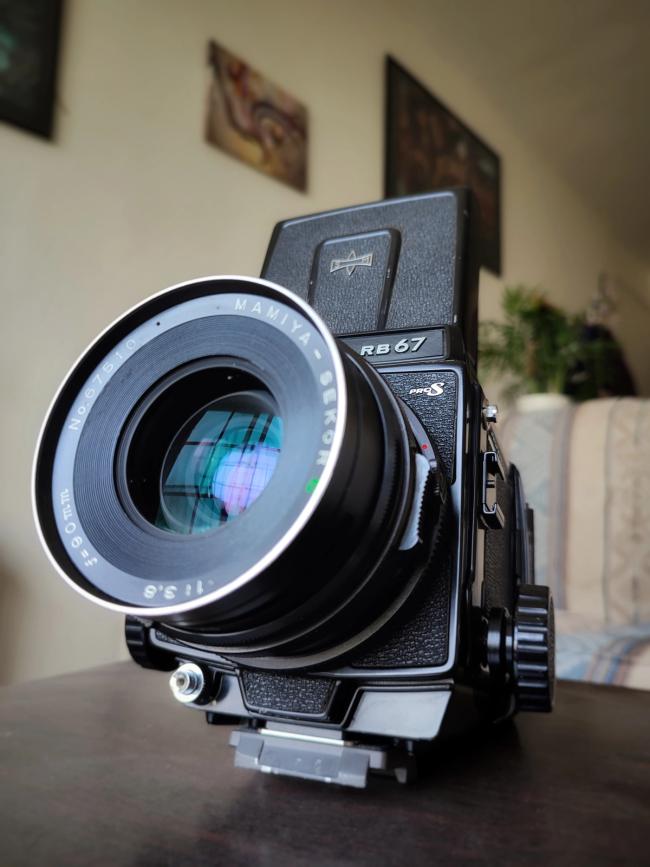
On March 23’ I got myself a great deal for a Mamiya RB67 Pro-S (a huge medium format camera from the 70’) and two Sekor lenses (90mm f3.8 & 250mm f4.5). That was two months ago, and even though the experience was amazing so far - it also had some major hiccups along the way, which are always part of the deal when you’re buying old equipment. Sometimes you get lucky with one small and easily fixable problem, and in other times - like in my case - it’s just a problem after another… after another…
My RB67 is already 5 tests older, and there’s still more planned ahead. I had to split this post into parts, as I didn’t want to overwhelm you - so this one will include the first 4 tests, and the rest will have to wait.
Hope you enjoy this “analog-tech-porn” type of content, and I’ll see you on the other side.
* The titles below are all lines from Radiohead songs, for no apparent reason.
Test #1 - Dreamers, they never learn.
It was right on the next day, after I bought the RB67, that I tested her with the Sekor 250mm lens on a roll of Fomopan 100. I would’ve loved to try the 90mm first, but unfortunately the part that connects to the body needed a fix.
I never had the chance to try out Fomopan 100 prior to that first moment, but because it was just a general test, just to see what works and what not - I didn’t think of it much.
And well, maybe I should’ve.
If it was today, I’d probably want to use my favorite Ilford HP5, despite the immense fear of wasting it, and just leave all other unknown film stocks aside for later experiments, as with the HP5 I could easily pre-visualize what I’m “suppose” to get, which “apparently” is quite important when testing a camera for the first time.
The Fomopan 100 negatives came back with positive results (hehe), but at the same time, the pictures were just so goddamn contrasty - it just left me really baffled and confused about the camera’s condition. Sure, I could’ve just guessed it was either the film stock or the development lab, and yet - this unnecessary confusion could and should’ve been avoided, and I definitely learned my lesson for next time.
These Fomopan 100 examples below are not edited in any way. Even though I didn't like the compositions, I still tried working with them, just to see what was possible - But failed miserably.

Now, despite my poor choice for this first test - I was super excited and relieved to know the camera works! I honestly couldn’t sleep. It felt like a start of a new adventure, and I was very much impatient to do a second roll.
Test #1.5 - No alarms and no surprises
I’m not listing this one as a separate test, because it really wasn’t meant to be one.
After I got the results from the first one, the next thing I had to check was the 90mm lens - only it was still waiting to be serviced, So I took the 250mm for another ride, hoping to maybe get along with her better this time.
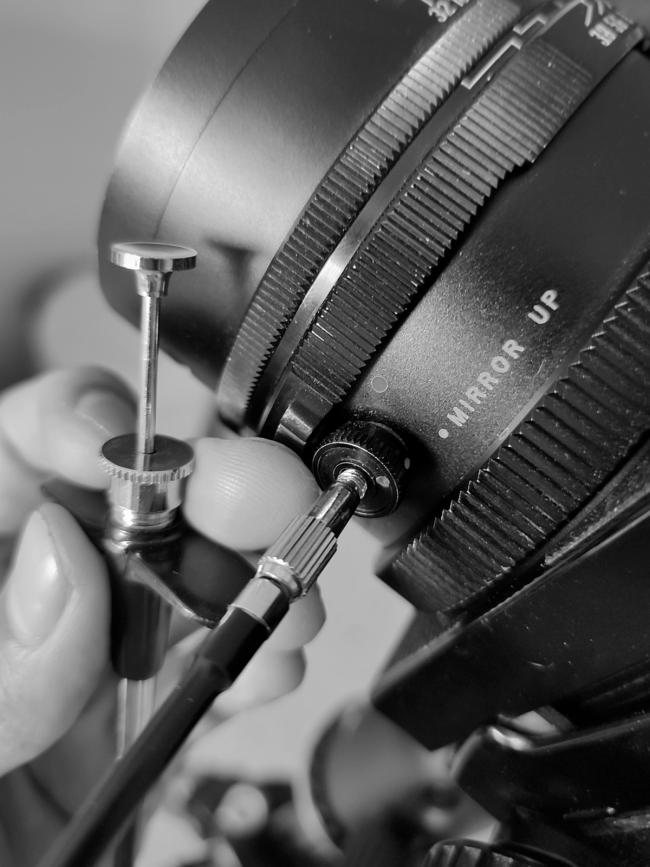
And indeed I felt a lot more confident in this round. I loaded a roll of HP5 and headed outside. I also decided to try out the mirror lock-up function, after reading about it and figuring out why it’s even a thing. The RB67 has a tendency to capture blurry pictures from time to time, because of how it gets a tiny kick from when the huge mirror inside folds up, right before the shutter releases. The mirror lock-up function eliminates that problem by separating the two actions. It’s a very simple tool that also adds even more “analog” vibe to the experience, with the addition of the cable release, just like in the old days of photography.
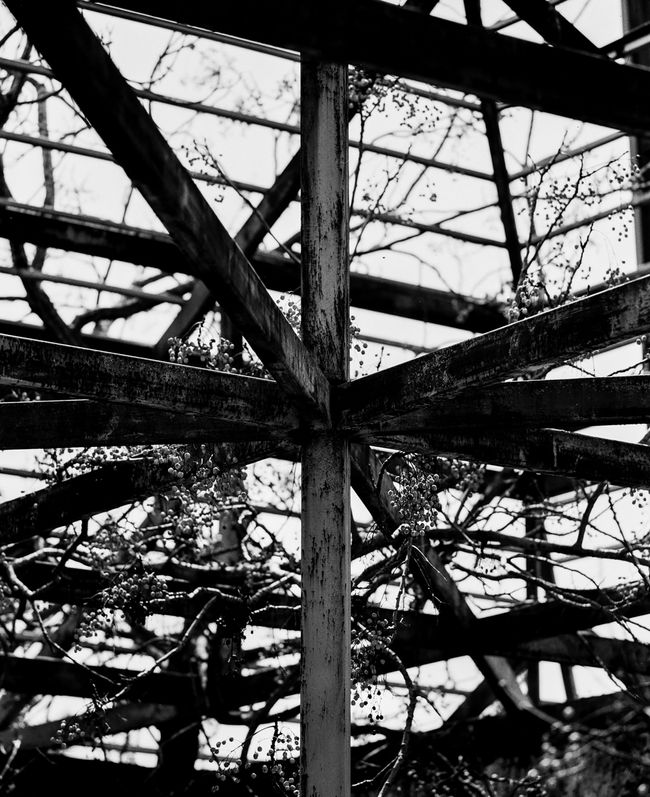
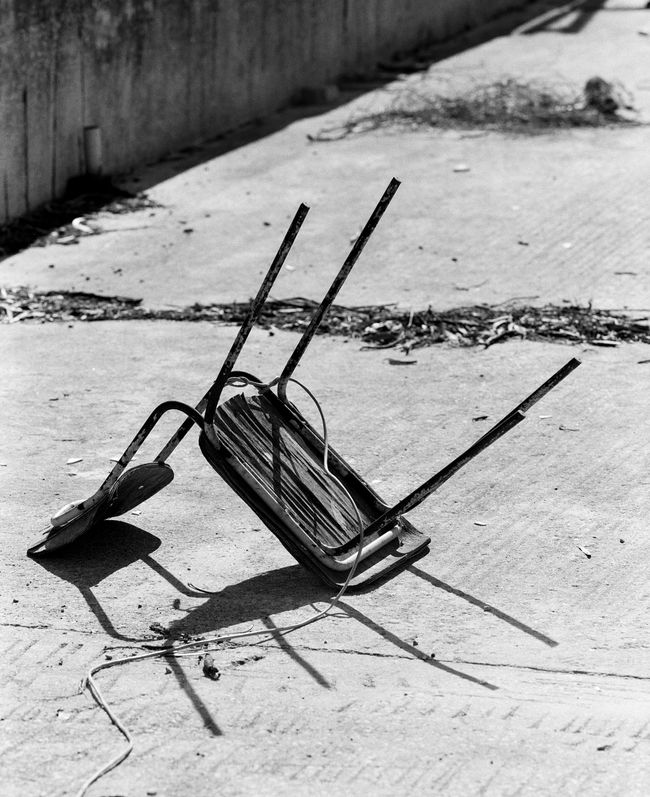
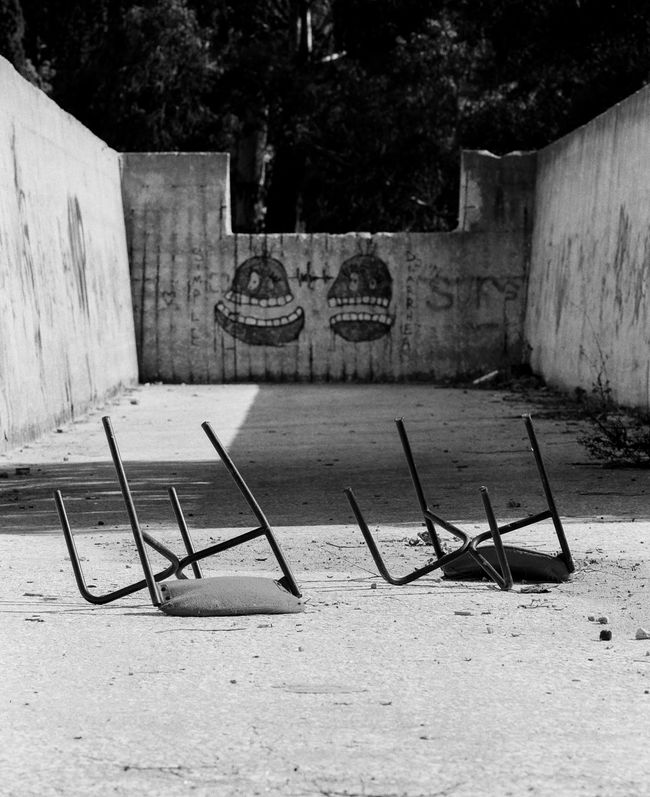
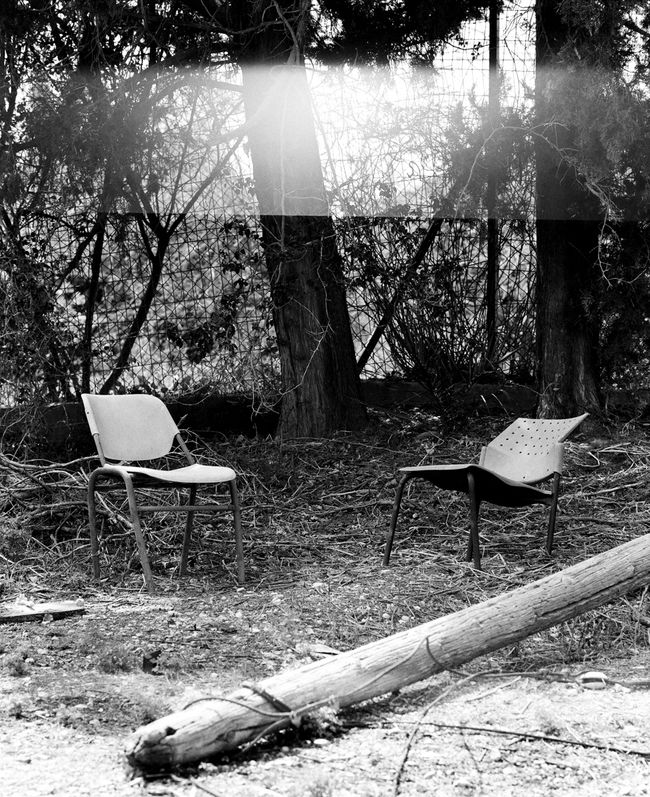
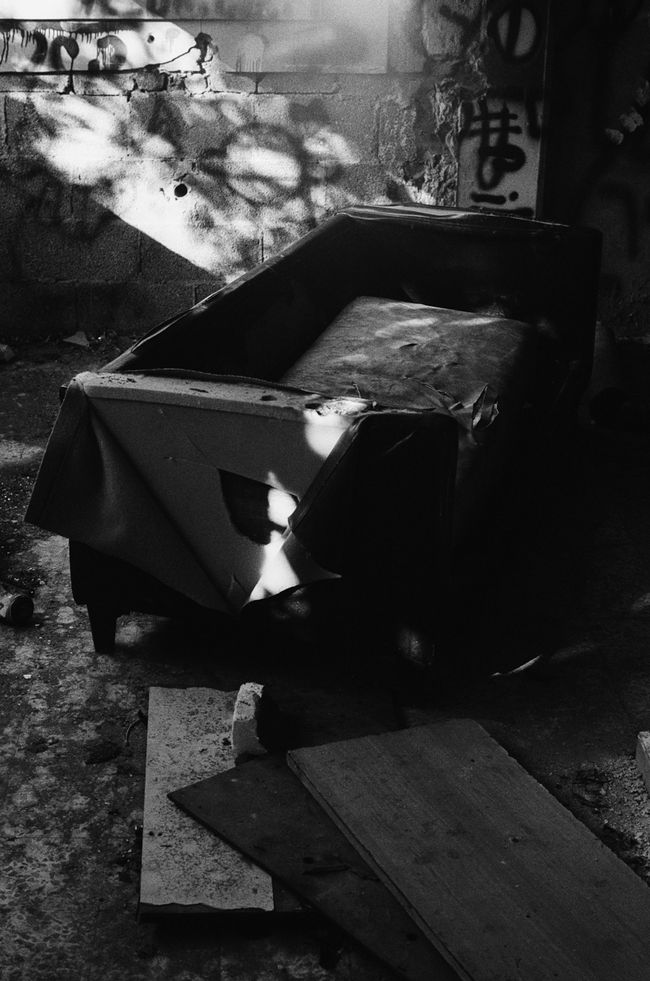
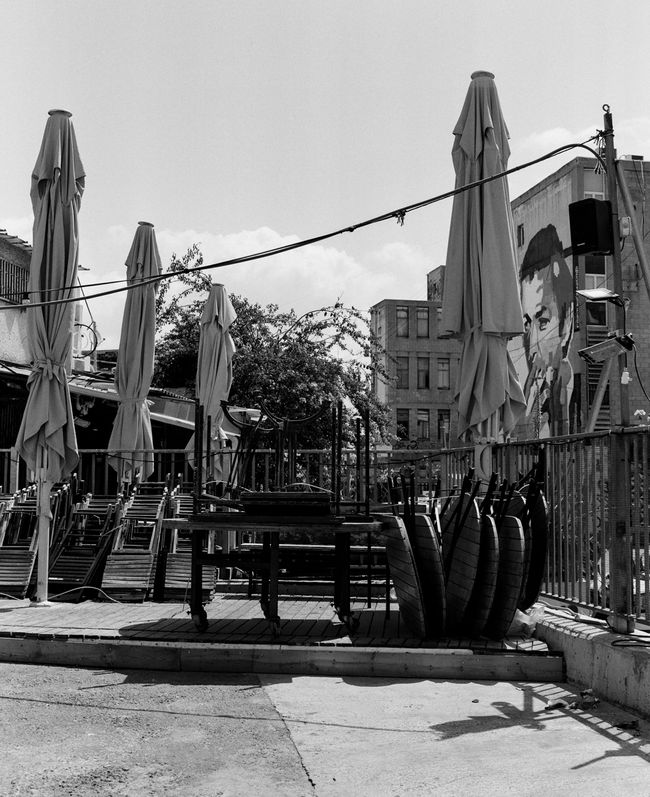
So while roaming around my neighborhood, I stumbled upon a huge vacant open space - that I’m not even sure what its purpose was - hiding behind a Thai food restaurant. It had lots of rusty old junk just scattered all around it, and even a tall crumbling house colonized by hundreds of bats. All that junk was a perfect subject for my 2nd roll. I even unintentionally captured a couple of lonesome chairs, and it all surprisingly came out pretty cool.
But… here is why I wasn’t sure if to consider this one a test or not. I really hope for you the next two photos won’t strike a bunch of shockwaves through your spinal cord, because that’s exactly what happened to mine, when I got the scans back. If you’re light-hearted - proceed cautiously.

Apparently, there was a small pinhole in the upper side of the camera’s bellows, which caused a consistent light leak whenever I focused on close subjects. Or maybe it only had to do with the position of the sun. I don’t know, and it doesn’t really matter at this point. I can only guess there weren’t any light leaks in the previous test because until that point the old bellows didn’t move for years, probably just collecting dust on the previous seller’s shelf, and so upon using them, the leather immediately started to wear down.
But truth be told - I’m still in love with those shots. Not only that I finally felt how clear and sharp the details can be in medium format, and how incredible that 6X7 frame looked - I was also very much pleased with what the light leaks added to them. I don’t want to delve into this topic right now, so I’ll happily add it to my future posts list - but I’ll just briefly say that as much as I’m mesmerized with their effect, I’d rather have the option to control their existence, than just accept it as a default.
(Just to be clear - I developed a couple of these tests together, and so I found out about this light leak problem only after the 4th test. So here’s your answer to your future question - Why didn’t you fix the light leaks before moving to the next one?)
Test #3 - If you take me there, you'll get relief
Almost a month after the 2nd test, the 90mm lens was serviced and ready to be used. I initially send her because of the busted part that connects to the body, but the repair guy said the shutter itself was in an even worse condition. “But now she’s completely fine” he told me, and so I immediately went out to test her.
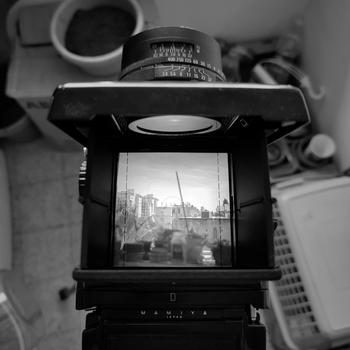
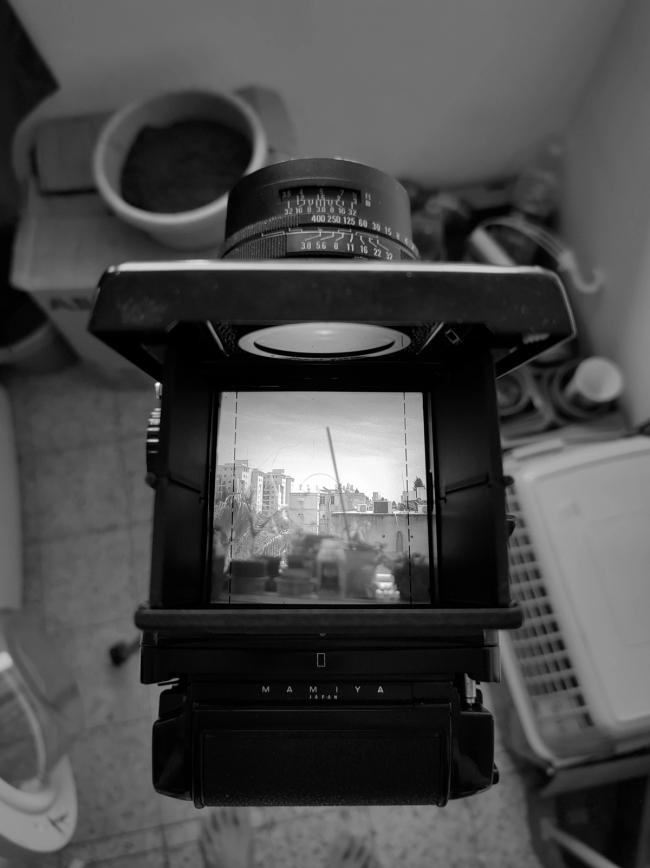
This post is not a review of the camera, so I won’t deviate much away from the tests themself - but I’d still just like to point out how incredible the view is through the waist level. When I looked through that lens the first time, I just couldn’t believe how everything around me suddenly became so beautiful. The focusing screen is huge, and very bright and clear, and It has a very unique and hard-to-describe look to it. Every subject looked so good in it, so much so that it even confused me at times; steered away my focus from finding cool light and shadow combinations, or interesting sites or shapes. I just wanted to capture everything, and it took me some time to be able to disassociate myself from that illusion.
So back to the test.
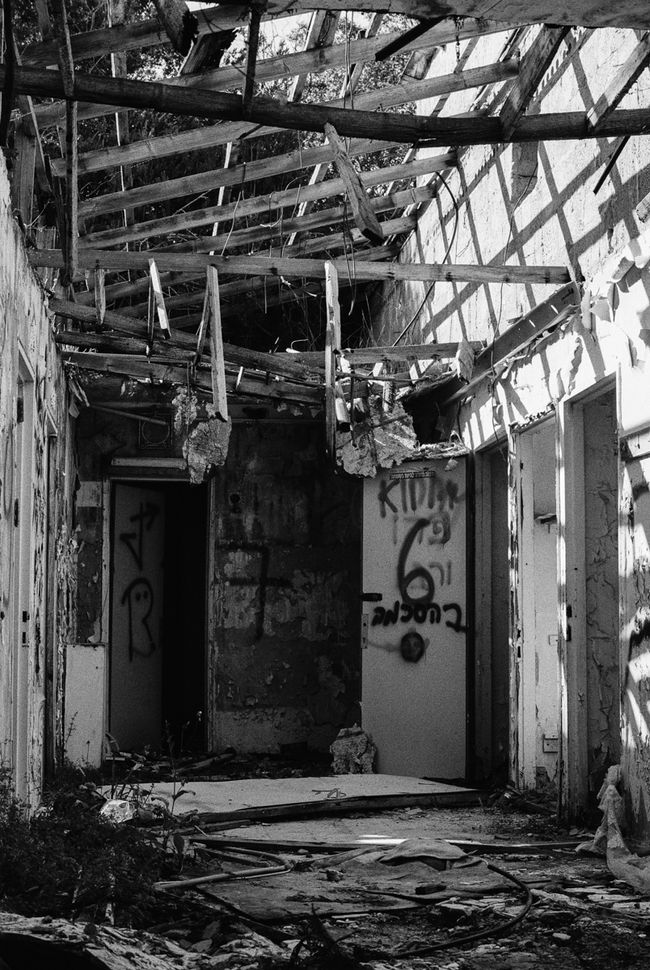
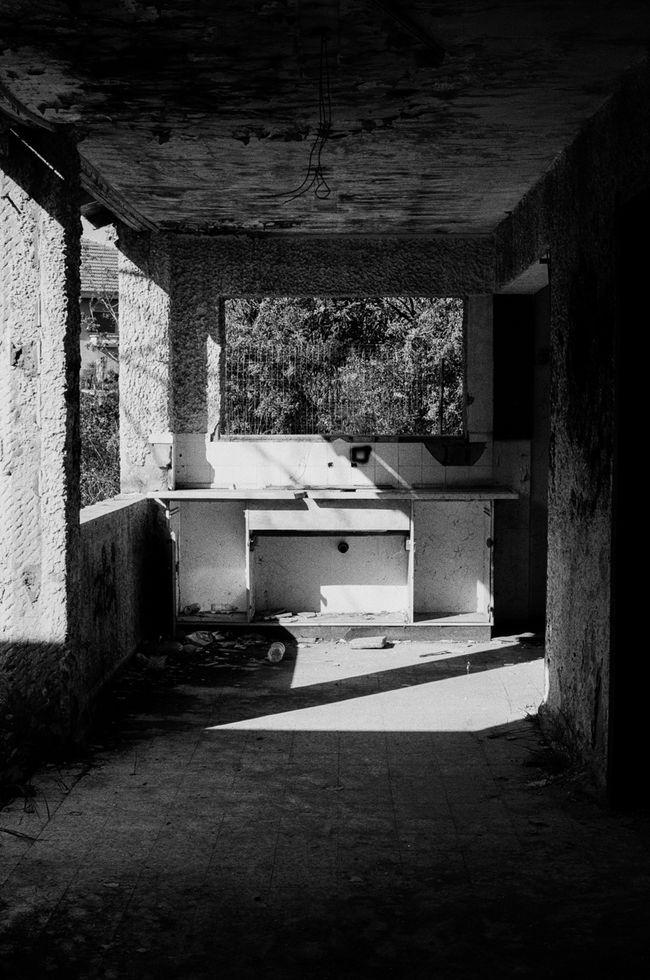
A friend of my dad took us to this place filled with abandoned buildings, with long stretched symmetrical corridors in them, and naked walls with layers upon layers of old paint. The site was very suitable for a first 90mm test run, even though that day was very cloudy, and those indoors weren’t so bright or interesting. Still, I took a bunch of straight-on shots of the corridors, and some other frames I don’t quite remember, and after a nice coffee break we headed back home.
And why do I need to “remember” the other shots, if I have the scans right in front of me? Well… that’s because I don’t.
That same day, when I arrived back home, my girlfriend was curious to see how the mirror lock-up function works (or maybe I just decided that for her… I unfortunately do that sometimes with her, when I’m too excited around new equipment), and so I did. I took out the film back and then showed her the whole process. I did all of the steps, then held the front lens in front of her and pressed the cable release button.
“Did you see the shutter open and close?” I asked her.
“No” she replied quietly.
And that was when I realized my 90mm lens was still busted. That test film was never exposed. The lost frames themself didn’t bother me much. there weren’t any groundbreaking shots in there. But the fact that I’ll have to wait another two-three weeks for it to be serviced again - after all this wait - it really took a toll on me. I felt frustrated and burned out.
Here are 3 shots from those abandoned houses I took with my Nikkormat FTn 35mm camera and a 50mm f1.4 lens. A painful memory, to say the least.
Test #4 - There was nothing to fear and nothing to doubt
A week after the last test, I managed to free a whole day to travel all the way to the same repair guy. He felt a bit ashamed of his mistake, and assured me the lens will be ready the next day (with no extra charge of course), but I assertively asked him to fix it on the spot, so I won’t need to travel all that distance again. He brought her back to life after two hours, and this time I made sure of that in front of him.
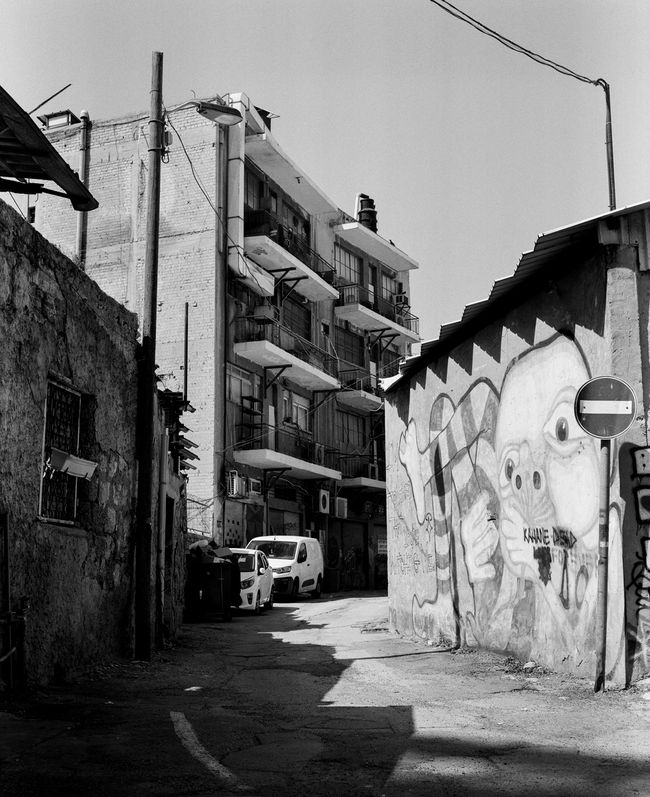
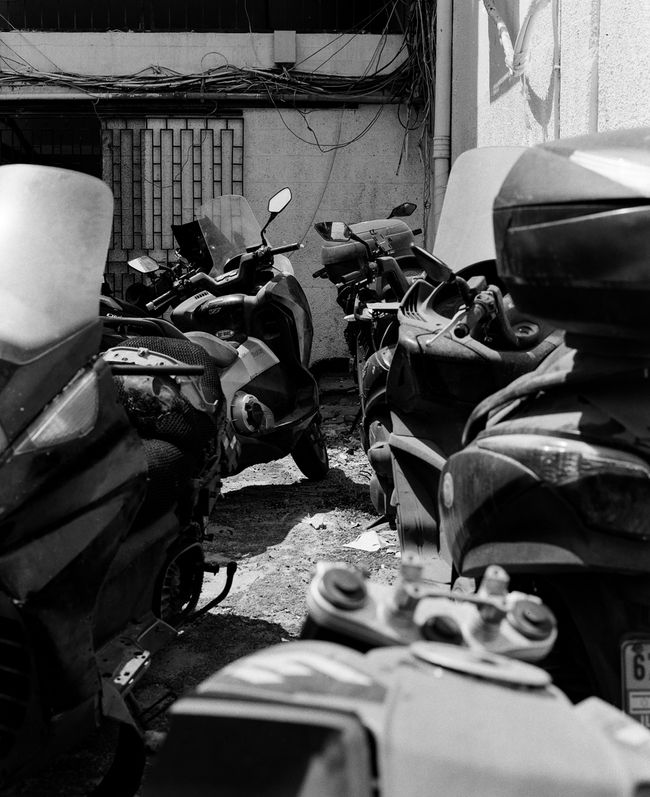
A few days later, my dad took us for a walk in Tel Aviv. We arrived at this huge industrial area, with big open parking spaces filled with old motorcycles, and long lines of garages with doors covered in graffiti and rust. I loaded a roll of HP5 as usual, and was about to take the first shot - but something kept the shutter release button locked. It happened quite a lot with the camera since I bought it, as it has many safety lock mechanisms in it, so I usually try to remain calm and look for the problem step by step - only this time I had no idea what was wrong.
I eventually realized something bad happened to the film back. The red marker that indicates a shot was already made was stuck, and I had to use some sort of weird combination to trick the camera and be able to use the damn thing. Long story short - even before finishing one test, I already had to plan the next one. A new film back had to be purchased immediately.
I still managed to finish the 90mm lens test, and the photos came out incredible. This time I tried using her without the tripod-mirror-lockup-cable-release combination, as I knew that as long as I opt for short shutter speeds, it should work just fine.
I have a lot of things I want to say about this whole experience; some questions I’d like to delve into in regards to its nature - but I’ll have to leave it for part 2, as this one is already long enough.
If you managed to read all the way through, I salute you, for it’s not a simple task at all, and even more today, where most people would prefer to watch a 2-hour youtube video, rather than reading 10 long pages (and I’m definitely one of those).
I’ll see you in the next part, and in the meantime - have a great rest of the week!